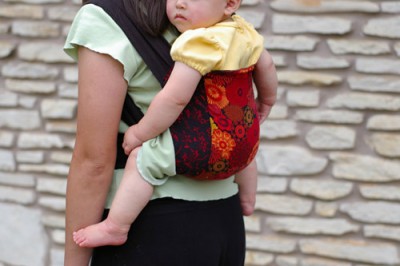
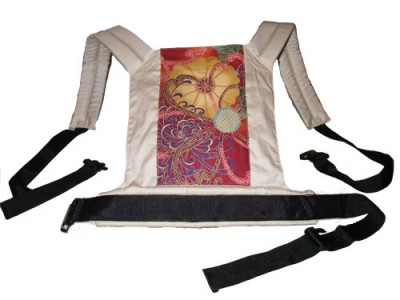
From my babywearing days, I have tried just about all styles of carriers. And my all-time favorite way to wear my babies is in a Mei Tai carrier. It is very comfortable because it evenly distributes the baby’s weight on both shoulders. The only problem is that all the ones I’ve come across have long straps that you have to tie. My second favorite carrier is the Ergo baby carrier. The problem with that one is it’s too bulky and hot for our Texas weather but I like how easy it is to put it on. So, I have come up with my own design for a buckled mei tai carrier that combines the best of both styles. It is:
- easy to sew
- strong and durable yet lightweight
- comfortable with minimal padding only where necessary
- easy to put on and take off
- small enough to stuff in a diaper bag
Take a closer look!
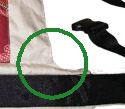
 Remember that your carrier is only as strong as its weakest point. That would be the corners where the back panel and waist strap come together where your carrier is being pulled in two directions. If you look closely on the Ergo baby carrier, you will notice that those corners are reinforced. In my pattern, the back panel and waist is a one piece two-ply fabric and the corners are contoured. Not only is this easier to sew, but this simple change takes much of the stress off the weakest point of your carrier.
Here are the materials you need to sew this carrier:
- 2 yards of non-stretchy bottomweight twill or denim fabric
- 1 yard of 2″ nylon webbing for the waist strap
- Two yards of 1.5″ nylon webbing for the shoulder extension straps. Cut in half to get two 1-yard long pieces
- One 2″ wide stealth buckle
- One 1.5″ wide dual-adjust buckle
- 3 pieces of 1/2″ thick foam – padding for the waist and shoulder straps, each 3″ wide by 22″ long
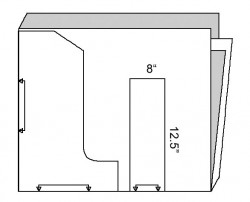
- Fabric cutting layout for 44” or 58” fabric: Fold fabric in fourths, crosswise, then lengthwise. Cut as shown to get one two-ply body/waist panel and two 25” straps by 8” wide. Download the free pattern for the body panel here.
- Finish all webbing edges – using a lighter or candle, carefully melt and fuse the edges to prevent unraveling.
Basic Sewing Directions:
You can purchase detailed instructions along with the body panel pattern printed on 8 1/2″ by 11″ paper for only $4.
- Make two shoulder straps, 4″ wide x 25″ long, with foam inserts stitched in place. Taper in one end and reinforce stitch the 1.5” webbing in place.
- With right sides together on the two-ply body/waist panel, stitch the body/waist panel along the sides. Make about three ¼” long slits at the curves.
- Turn over through the top opening.
- Insert the waist foam piece in place through the top opening.
- Using the pattern, mark the four points for each of the shoulder strap placements. Stitch in place using a reinforced stitch pattern.
- Topstitch all around.
- Loop the female part of the 2“ buckle through the left end, tucking the ends under.
- Stitch webbing in place, reinforce stitch at both ends.
- Loop the remaining webbing through the buckles, making sure theys are oriented correctly. Fold the ends over twice and stitch. This is a safety measure to keep the webbing from sliding completely out of the buckles although with the carrier on and the straps taut, the tension is enough to keep the webbing from sliding loose.
- If you want a decorative panel, simply sew it on after the carrier panel is complete. I do not recommend pockets on the panel. They’re impractical – you cannot put keys or anything sharp in there as it will poke your baby and if you use it as a back carrier, you can’t reach the pockets. Instead, clip a small purse to your carrier.
Want to make it easier?
Get the sewing kit to make a solid black buckled Mei Tai carrier for $36.95, notions-only kit for $18, or detailed instructions for only $4.


19 Comments